

How To Check If Phpmyadmin Is Installed On Ubuntu
Managing a database is a circuitous merely necessary role of running a website. Luckily, software like phpMyAdmin exist to brand the process much easier. This popular administration tool may seem challenging to learn, merely accessing and modifying your database will be a breeze once you have the hang of it.
The most hard office is knowing how to install phpMyAdmin and setting it up on your web server. If you lot're having trouble, you lot're certainly non the only 1.
In this article, we'll show you footstep by step how to install phpMyAdmin on all major operating systems, plus how to configure information technology from in that location.
Let's get going!
Prefer to watch the video version?
What Is phpMyAdmin?
Backside every website is a database. This database allows you to store data ranging from user account information to the posts you lot make on your site. While in that location are many database services, MySQL is the almost popular one. And most likely, it'south the one your website is using. MariaDB is a common culling.
Interacting direct with MySQL can be complicated and confusing, specially if you're new to website administration. Simply interacting with your databases is ofttimes a necessary office of site maintenance.
phpMyAdmin was created to bring a browser-based visual interface to MySQL and make it easier to work with your database. Due to its popularity, many web hosting services include access to phpMyAdmin, including Kinsta.
Why Do Yous Need phpMyAdmin?
Without a tool similar phpMyAdmin, your only option for accessing the database is with the command line. It means you accept no visual interface — just a text prompt where y'all put in commands. Doing it this way tin exist disruptive and may even lead to accidentally breaking your site.
phpMyAdmin is gratuitous and open source. A wide range of web hosts supports it, and you can fifty-fifty install it yourself without paying a single cent. And in one case you've installed it, executing database commands from the visual interface is much more intuitive.
Still on the argue? You lot tin try phpMyAdmin yourself to see if it's a database manager yous'd like to employ. One time yous've given it a test drive and decided you'd similar it, you can install the tool on your server.
phpMyAdmin Requirements
The requirements to install phpMyAdmin are, luckily, relatively simple. If y'all accept a web server of whatsoever kind, you should almost certainly exist able to go information technology running. Here are the detailed requirements:
- A webserver of any kind
- MySQL or MariaDB 5.5 or newer
- A web browser that supports Javascript, cookies, and Bootstrap four.5 (to admission phpMyAdmin)
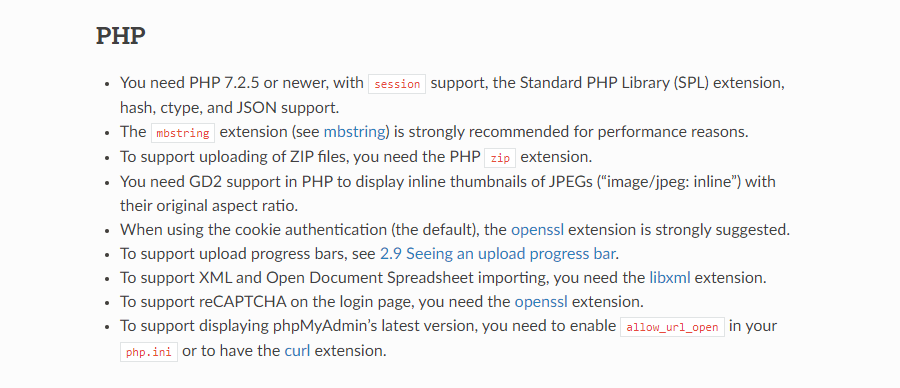
- PHP seven.2.five or newer
- Additional PHP requirements: The session and SPL extensions, hash, ctype, and JSON support. Other extensions such as mbstring can improve performance or add additional minor functionality (come across the requirements page for the complete list).
Before you try to install phpMyAdmin, remember that many spider web hosts already come with it installed. Kinsta is amid them; if y'all want to access the database manager, log into your Kinsta account, and so go to the Info tab and look for Database Access.
Before installing phpMyAdmin, check your web host'due south documentation to ensure they've not installed it already.
Step By Step: Installing phpMyAdmin
Once y'all've checked to brand certain your server supports phpMyAdmin, it's time to become to work installing information technology. Web servers come in a wide range of operating systems, so we've included all the well-nigh pop ones, including Windows, Mac, and multiple distributions of Linux.
With that, hither are the step-by-step instructions for installing phpMyAdmin.
How to Install phpMyAdmin on Windows 10
Equally the requirements state, you're going to need a web server with PHP and a database to utilize phpMyAdmin. While you can undoubtedly download Apache, PHP, and MySQL manually, at that place's a much simpler option to get a server upwardly and running on a Windows figurer.
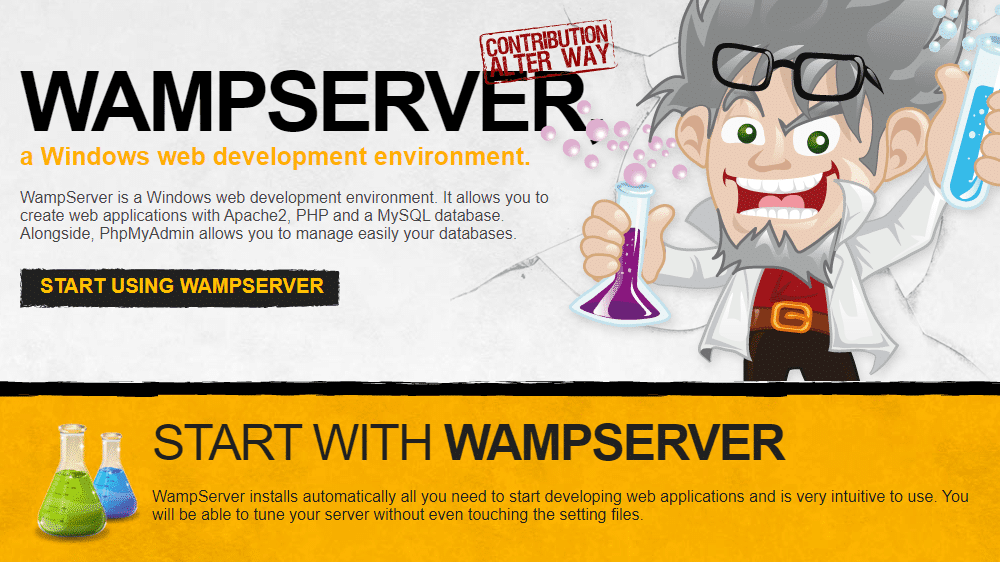
WAMP (Windows, Apache, MySQL, and PHP) is complimentary software that hands allows yous to create a server with all prerequisites. You tin also try XAMPP for Windows (Apache, MariaDB, PHP, and Perl) if it suits your needs improve.
Once y'all have 1 of these downloaded, it's just a thing of installing it and walking through the setup process.
Suppose you're using WAMP or XAMPP. Both of these come with phpMyAdmin already! In your browser, navigate to http://localhost/phpMyAdmin , and you should see the login screen, confirming that you've installed everything correctly.
How to Install phpMyAdmin on Mac
Getting phpMyAdmin on a Mac is a little dissimilar. All the prerequisites are the same. But as macOS ships with both Apache and PHP, y'all don't demand to download them.
With Mac, you have two options: You can use XAMPP just similar with other operating systems or install everything manually.
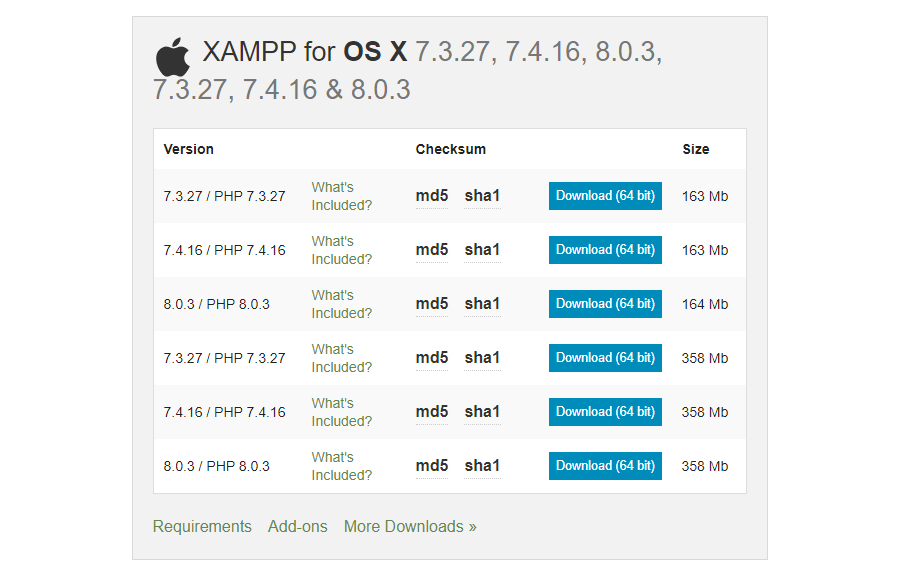
Download XAMPP for OS X, open it, and drop information technology into your Applications folder.
Open XAMPP Control from /Applications/XAMPP/managing director-osx.app to start your Apache and MySQL servers. If you and so visit http://localhost, you should find everything working correctly and your phpMyAdmin login under the "Tools" section.
If you'd instead install phpMyAdmin manually, the process is simple. Since y'all already have Apache and PHP, you only need to download MySQL. Make certain you select macOS from the dropdown. Download and install the file, follow the instructions, and record whatsoever usernames and passwords given to yous.
You lot tin can so open up Organization Preferences and launch MySQL to start a server. You can too start Apache by running this command in the Terminal:
sudo apachectl kickoff 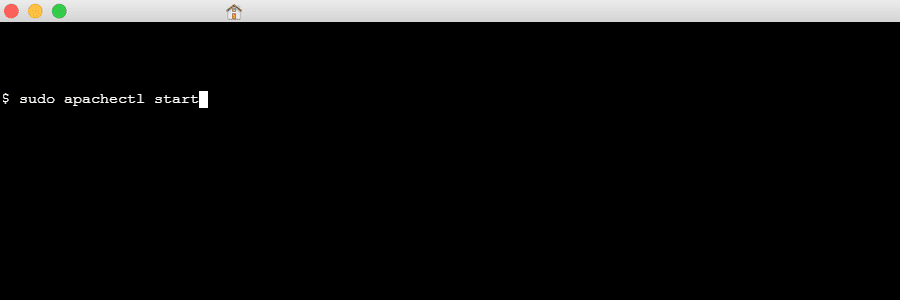
With that, all that'southward left is installing phpMyAdmin. Rename the binder to "phpMyAdmin" and move it to /Library/WebServer/Documents/. Bank check to make sure it'southward installed correctly past visiting http://localhost/phpMyAdmin in the browser.
If you have Homebrew installed, another option is to put in the control: brew install phpMyAdmin.
How to Install phpMyAdmin on Ubuntu
Every bit one of the most popular and most accessible to use Linux distributions, Ubuntu is a skillful choice for your server.
While manual installation of Apache and MySQL is always possible, Linux has its ain "stack" of standard server software known equally LAMP (Linux, Apache, MySQL, and PHP). Unlike WAMP and XAMPP, this does not come with phpMyAdmin, so yous'll demand to install it manually. Luckily, Ubuntu allows y'all to practice all of your installations through the command line.
Get-go, check that tasksel is enabled. Server editions of Ubuntu should come with it installed, just if you accept a desktop edition, you tin enable it with this command:
sudo apt-get install tasksel After that, you tin use tasksel to install a LAMP server with this command:
sudo tasksel install lamp-server 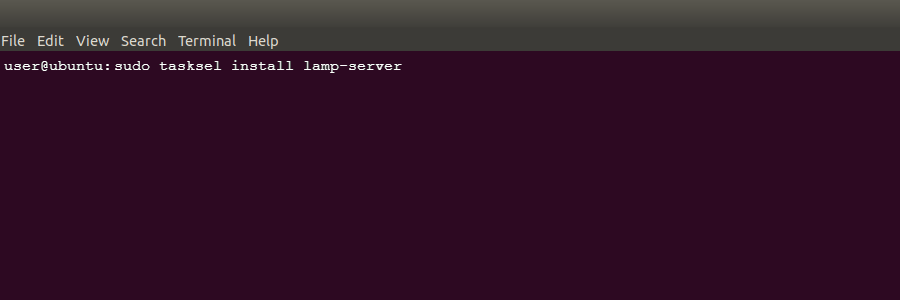
Now, yous tin can install phpMyAdmin:
sudo apt install phpMyAdmin With that, you have all the necessary files to run a server on your reckoner.
How to Install phpMyAdmin on CentOS 7
Installing phpMyAdmin on CentOS 7 is very similar to other distributions, only the commands are slightly unlike equally this OS uses Yum rather than the typical apt command.
There's also no simple LAMP stack that installs all the server components y'all need at once, then y'all'll need to download Apache, MySQL, and PHP manually. Thankfully these can be easily obtained through the control line.
Beginning, let's go a LAMP stack downloaded using the control line, beginning with Apache:
sudo yum install httpd.service To beginning the Apache server and ensure it runs on boot, use these commands:
sudo systemctl starting time httpd.service sudo systemctl enable httpd.service Now it's time to install a database. CentOS 7 defaults to installing MariaDB. Information technology is also fully compatible with phpMyAdmin, so it's rubber to use. While it'south possible to download MySQL instead, information technology's a much more complicated process. Let's use MariaDB:
sudo yum install mariadb-server mariadb
Now nosotros can run information technology and cause it to start at boot:
sudo systemctl commencement mariadb sudo systemctl enable mariadb.service To finish installing MariaDB and ensure it's secure, run the secure installation setup with the following control.
sudo mysql_secure_installation Concluding, nosotros tin install PHP with the additional MySQL package.
sudo yum install php php-mysql You'll also need to restart the Apache server, so it works properly with PHP.
sudo systemctl restart httpd.service With that, you have the LAMP stack you lot need and tin can finally get to downloading phpMyAdmin. Equally it isn't in the Yum repository, y'all'll need to install the EPEL repository instead with this command:
Subscribe Now
sudo yum install epel-release And install phpMyAdmin.
sudo yum install phpMyAdmin It takes a few more steps on CentOS vii, but you should now have a server ready for configuration.
How to Install phpMyAdmin on Debian
Much like CentOS 7, you'll need to install a LAMP stack using the command line manually. First, let'due south get Apache with this command:
sudo apt install apache2 Next, we'll install MariaDB. Like CentOS 7, this Linux distribution works improve with MariaDB, and we recommended you use that one instead.
sudo apt install mariadb-server And like with CentOS seven, you should run the secure installation to add together a database password and ensure that everything is secure.
sudo mysql_secure_installation Finally, we can install PHP and a few extra packages your server will need to work.
sudo apt install php php-mysql libapache2-mod-php And we can finish off by installing phpMyAdmin.
sudo apt install phpMyAdmin How to Access phpMyAdmin
One time yous accept phpMyAdmin appropriately installed, accessing it and logging in is the same on whatsoever operating arrangement.
You'll demand your web server'due south address, then append /phpMyAdmin/ to the end of it. If yous but fix a server on your figurer, the address is very likely simply "localhost," and so visit this link:
http://localhost/phpMyAdmin Information technology may too be an IP, or even a named address if this is a server you already have running on the web. If you're not sure, you can likely observe the address in your Apache or MySQL config files.
Once yous're on the login screen, you'll need a username and countersign. If this is a fresh installation, the username is likely "root," and you can exit the password bare. If that doesn't work, the countersign may be "password."

If you can't log in, check the phpMyAdmin or MySQL config files to discover your login info. You may take also changed the login info during the installation process.
Linux users should try the following Linux command if they're having trouble accessing the page or logging in:
sudo dpkg-reconfigure phpMyAdmin Lastly, y'all should notation that if you lot're using a spider web host such as Kinsta with phpMyAdmin preinstalled, you tin usually discover login info and links in your hosting dashboard. In this case, you lot don't need to install phpMyAdmin on the server manually.
Configuring phpMyAdmin
With the database manager installed and gear up to keep your system, you should know how to configure phpMyAdmin. Like with any server software, you're certainly going to desire to do enough of tinkering with the settings.
An unconfigured phpMyAdmin can also pose a potential security take chances. There are a few actress steps y'all need to take to lock down your system.
If y'all ever need to restore a fill-in of your database, yous can always use phpMyAdmin to import a new SQL file. Always make frequent backups before doing whatsoever significant modifications to the database or its settings, especially if you're non just working on a examination server.
How to Run SQL Queries
At present that you have phpMyAdmin working, you should know how to do what it'southward made for: running SQL queries.
You tin can run queries either on the homepage (this will apply to the unabridged site), or in a specific database or table. Click the SQL tab at the top of the screen, blazon in your command, and press Go.

Here's a list of common SQL queries:
- Select: The nearly of import tag, used at the beginning of almost every query.
- Create Table: Create a new table.
- Alter Table: Add new columns.
- Insert: Add new rows.
- Delete: Remove columns.
- Update: Edit values in a table.
- Sum(): Adds up all the values.
- Avg(): Boilerplate the values.
- Count(): Counts the number of filled columns.
- Round(): Rounds the value to the integer you gear up.
- Max(): Return the largest value.
- Min(): Return the smallest value.
- Between: Select columns inside a specific range.
- Group By: Group tables by information.
- Order By: Order results in a certain fashion.
There are certainly more than commands to acquire, simply those are a few to commencement with.
How to Change the Default phpMyAdmin URL
Leaving the phpMyAdmin access link on its default setting (http://website.com/phpMyAdmin) can pose a security run a risk.
If you make this folio easy to observe, hackers will be able to visit it and attempt to brute force downward your username and countersign. It can exist even worse if you've left the credentials on the default "root" and "password."
But by changing the URL to something but y'all know, you can make it much more hard for unknown users to access this page and try to gauge the password.
Open phpMyAdmin.conf in a text editor, which y'all tin find under C:\wamp\alias on Windows/WAMP, xampp\apache\conf\actress on XAMPP, /etc/httpd/conf.d on Linux, or /usr/conf/actress on Mac.
You should run into this line in there:
Alias /phpMyAdmin /usr/share/phpMyAdmin Change the /phpMyAdmin path to the new address of your choice. For instance:
Alias /exampleURL /usr/share/phpMyAdmin Now you can access this unique URL for phpMyAdmin by visiting the custom address yous set (http://website.com/exampleURL).
How to Set Up an NGINX Authentication Gateway
Some other choice is to set up a second layer of security with an hallmark gateway. Subsequently moving the phpMyAdmin login page to a secret location, yous can password protect this folio to make it even less likely for attackers to go through.
Users of Linux on an NGINX server can run the following commands in the command line to create an authentication gateway (this is too possible on Apache servers).
Commencement by creating an encrypted password (change "example" to whatever you like) and noting down the result:
openssl passwd example Create a configuration file in NGINX'south folder and give it a proper noun:
sudo nano /etc/nginx/examplename Enter the username and password into this file similar this, being conscientious to leave in the colon:
exampleusername:examplepassword Now open the NGINX configuration file.
sudo nano /etc/nginx/sites-bachelor/default Within the "server" block, we'll add our gateway past pasting the following code (make certain to alter the values).
location /example { auth_basic "Login"; auth_basic_user_file /etc/nginx/examplename; The start /example should be any you lot fix your phpMyAdmin URL to, and you can adjust the auth_basic variable name to anything you want, and the concluding /examplename should be the name of the password file you lot created earlier.
At present upon login, you should be required to enter the credentials you set before even seeing the phpMyAdmin login.
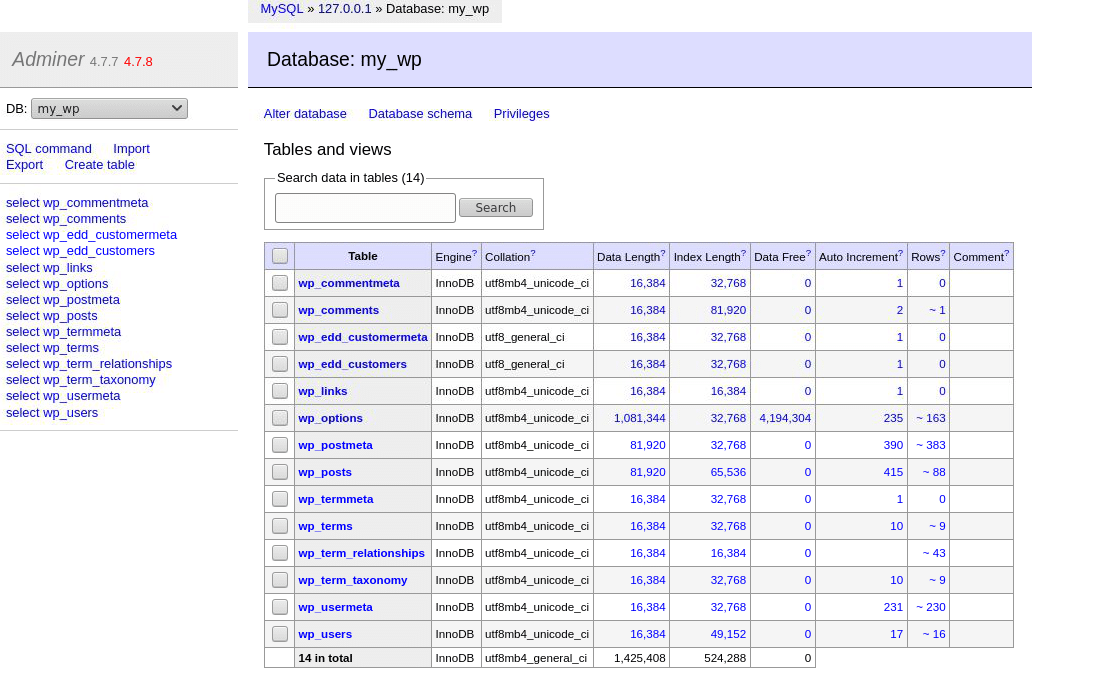
Adminer: A Simpler Alternative to phpMyAdmin
Adminer is a free, open source database management tool similar to phpMyAdmin. Formerly called phpMinAdmin, Adminer was explicitly designed equally a simpler, better alternative to phpMyAdmin.
It's effortless to deploy on any web server. All it takes is uploading a single, lightweight PHP file.
Fifty-fifty DevKinsta, Kinsta's free suite of local development tools, uses Adminer to run its database manager. Information technology supports many powerful database management features such as like shooting fish in a barrel database switching, viewing and editing tables, manipulating database values, importing and exporting databases, running SQL queries, and much more.
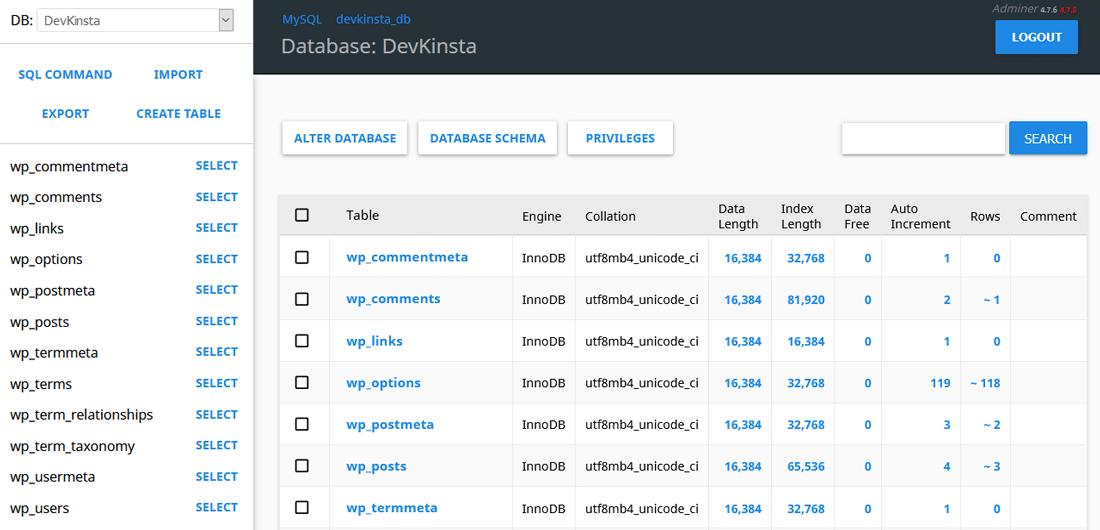
You can learn more virtually Adminer, its features, and how to use it in our dedicated Adminer article.
Summary
Your first time using phpMyAdmin can be intimidating. Only once you know how to install and configure it, accessing your database will be as easy every bit logging into WordPress.
Windows, Mac, and Linux users alike can all make utilize of this invaluable database manager. Equally long equally you accept a web server with PHP installed, getting it running should be simple if you follow our instructions. Remember to configure it properly and make sure it'due south secure, and you'll never have problem modifying your database over again.
Save time, costs and maximize site performance with:
- Instant help from WordPress hosting experts, 24/7.
- Cloudflare Enterprise integration.
- Global audience reach with 29 data centers worldwide.
- Optimization with our built-in Awarding Operation Monitoring.
All of that and much more, in one plan with no long-term contracts, assisted migrations, and a 30-day-money-back-guarantee. Check out our plans or talk to sales to discover the program that's right for you.

Source: https://kinsta.com/blog/install-phpmyadmin/
Posted by: mcdonaldgrot1995.blogspot.com
0 Response to "How To Check If Phpmyadmin Is Installed On Ubuntu"
Post a Comment